(By Paul Bastow)
I got my hands on a sturdy peice of round, tool steel to be the main
component for holding the foot pegs, shifter and brake
pedal. I removed the existing footpegs and chassis
from the bike and strung up the bar with some wire,
to take measurements. I thought about making the
pedals and linkages myself too, but I figured the final
product wouldn't look all that hot, so I went to the
local Harley-Davidson shop to look at what they had to
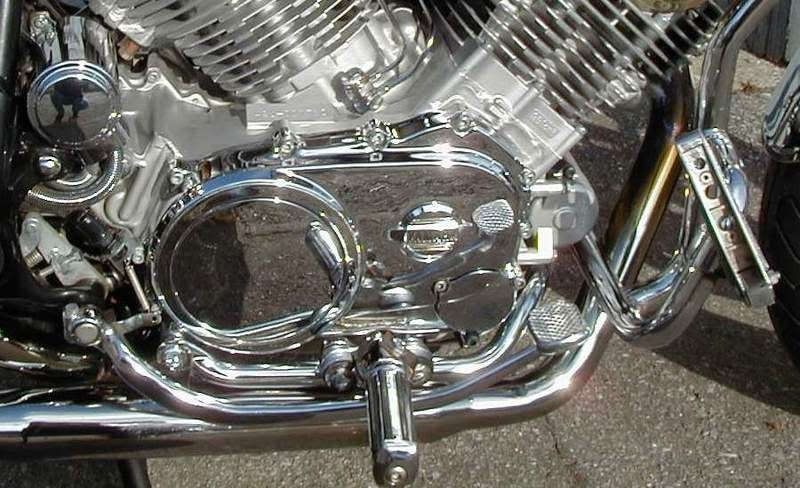
offer. The forward control pieces on the 883 sportster
were perfect. Why Harley? Because there are billions of
parts avaliable for the Harley-Davidson name. I was
SURE to find what I needed and I wasn't disappointed.
I took some measurements and found that I would have
to mill my steel bar only a little bit to get the shifter and
pedal to fit. As luck would have it, the Harley parts were
teflon lined too, smooth shifting and braking.
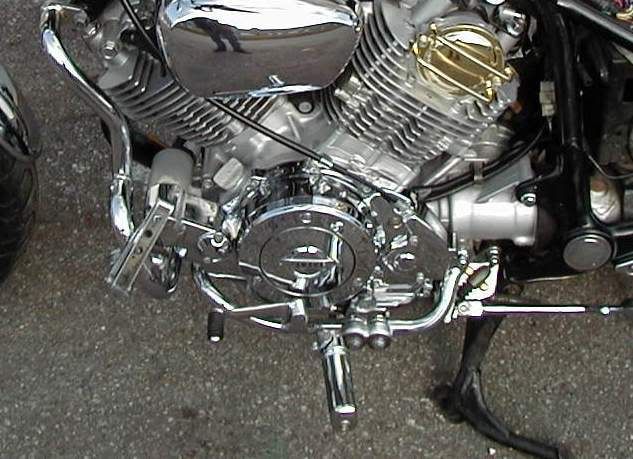
I made some final measurements and had the steel bar
lathed to the proper diameter. The parts fit together like a dream. I used
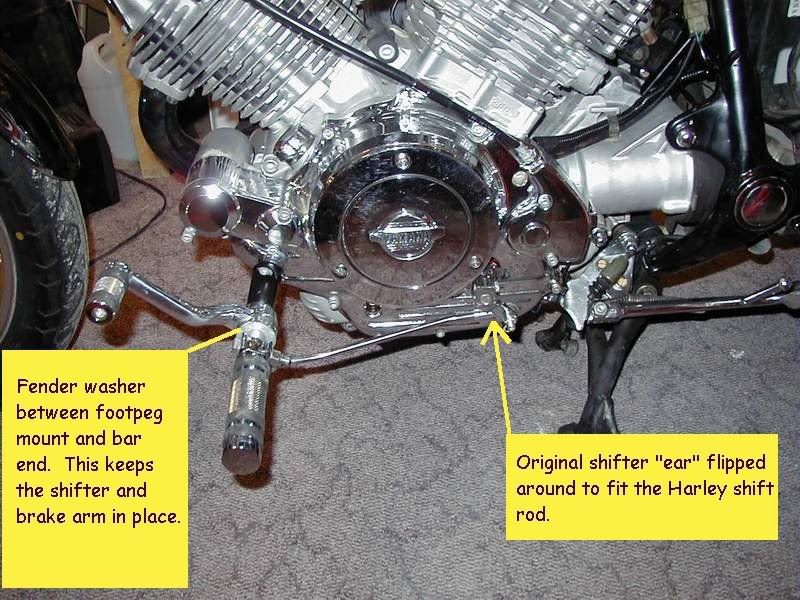
female mounted footpegs. This and a
washer will hold the shifter and brake pedal in place.
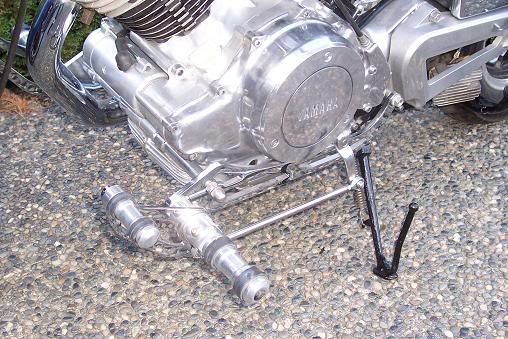
Two brackets were welded into the middle of the bar to
mount the whole assembly to the engine, where the
carriage for the old pegs and shifter used to be mounted.
To dress up the finished product and to protect it from
the elements, the bare metal was prepared with POR-15 Marine Clean (biodegradable degreaser), POR-15 Metal Ready
(surface primer) and then painted with POR-15 Satin Black
Paint. This will guarantee my custom work never to rust
and to resist rock chips, not to mention matching the finish
of the rest of the bike frame.
Many of you have expressed an interest in my custom
forward controls. Please feel free to use the information
listed below to fabricate a set for your very own. The final
cost, excluding your time, should be about $400 US. The
big part of the cost is the Harley Davidson parts. They
don't give those things away. Parts required;
Part Description
QTY
Part Number
Harley-Davidson Gear Shifter.
1
# 49303-98
Harley-Davidson Brake Arm assembly.
1
# 49301-98
Harley-Davidson Shifter Rod.
1
# 11763
Harley-Davidson Shifter Rod Ends
3
# 33871-85A
piece of round tool steel, 17" long by 1" dia.
1
(mounting bar)
pieces of mild steel, 1 1/2" x 1" x 1/4"
2
(mounting ears)
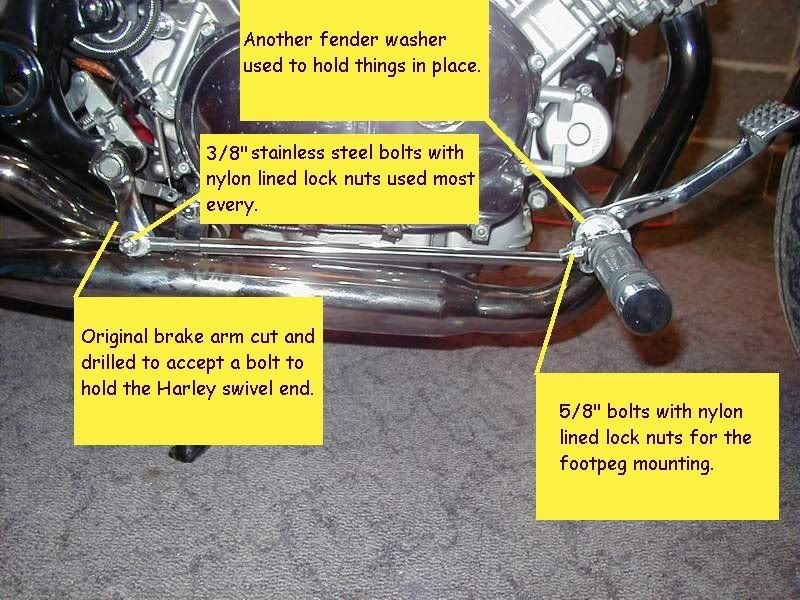
Stainless Steel 1 1/2" fender washers.
2
(holds the controls in place)
5/8" #24 stainless steel nuts.
2
(squeeze nuts for the linkages)
Female Harley-Davidson type footpeg mounts.
2
Female mount, Harley-Davidson compatible footpegs.
2
1" x 3/8" Stainless steel #24 bolt
3
(linkage fasteners)
3/8" nylon lined #24 nut
3
1 1/2" x 5/8" Stainless steel #24 bolt
2
(footpeg fasteners)
5/8" nylon lined #24 nut
2
The steel rod has to be milled and drilled on either end so
as to fit the shifter and brake arms. When you bring the
rod to the metal shop to be lathed, bring the Harley parts
too. The machinist can measure the inside diameters of the parts to
mill the bar just right. Be sure to have the bar ends
a fraction longer than the width of the shifter and brake
arms. This is so when you install the fender washers, to
hold the shifters in place, they won't bind up against the moveable parts.
Either end of the bar will also be drilled out and tapped to
fit the female mountings for the footpegs. These mounts
will also hold the fender washers in place. When I installed
my mounting pegs, the fit was very snug. Depending on
how well your bar is tapped out, you may need to put
some loctite in the threads or add some lock washers
to keep your footpegs from moving.
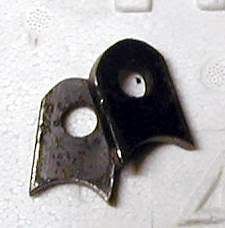
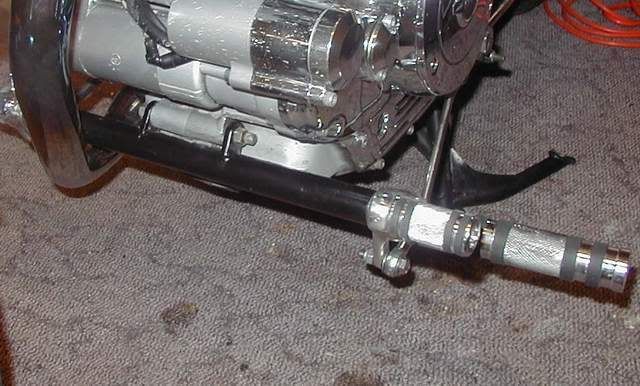
Next you need to fabricate some mounts to attach the
bar to the engine case. I used two small pieces of 1/4"
mild steel. I cut each piece 1 1/2" long and drilled a 5/8"
hole in either end of both pieces. Be sure to leave a 1/4"
of material between the side of the hole and the end of
the piece.
Using a 1" drill bit, enlarge one of the holes on each
piece. Hold both pieces tightly in a vice and saw the 1"
hole in half. This is the makings of the mount that will
be welded to your milled bar. using a round file and a
flat file, clean up all of the edges to make near perfect
fits. I was able to get excellent results by putting a
piece of carbon paper between the rod and the 1"
mounts and then filing away all of the blackened areas.
The end of the mounts with the 5/8" holes need to be
rounded out. This will take a bit of work. You may want
to use a hack saw to cut away a small piece of metal on
each corner so as to make filing easier. Round out the
ends of your mounts so that there is 1/4" of metal all
the way around the drill hole.
On the bottom of your bike, measure the mounting
bracket where you're going to attach your forward controls.
It's the bracket where the chassis for your old footpegs
and shifter was mounted. The width of that bracket is
going to be the inside width of the mounting bracket on
your new controls. Weld the two mounts to the bar using
that measurement.
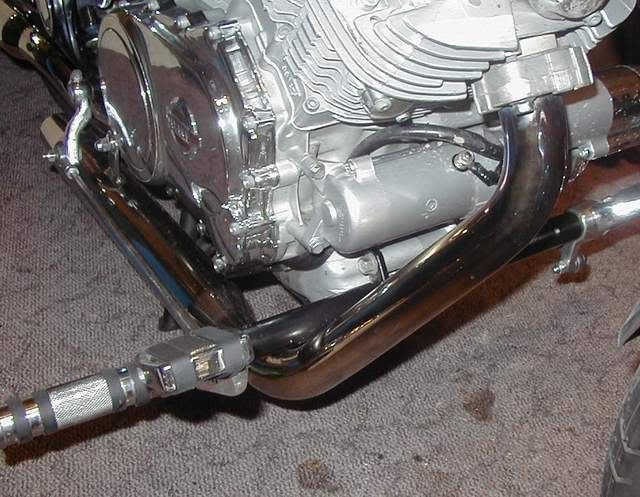
Attach the new bar to the engine case and put on all of
the gear (shifter, brake arm, washers, footpeg mounts
and footpegs.) Be sure everything fits right and things
move smoothly.
Assemble the shift rod and swivel ends, complete with
one squeeze nut on each side. Using a 3/8" bolt and
nut fasten the assembly to the Harley shifter.
You will notice, when trying to attach the shifter rod to
the Yamaha gear box linkage, the rod looks a little long.
That's because it is. The way to work around this is to
remove the gear box linkage and flip it around so that
the "ear" is pointing backwards. Before you do that though,
you'll have to drill out the old shifter mount that is on there.
Drill it so that you can put a 3/8" bolt through. Put the
shifter arm back on the bike and attach the Harley shift
rod. When you're happy with your setup, tighten the
squeeze nuts.
The brake setup requires a leap of faith. You must cut
your existing brake arm and drill a 3/8" hole into it to
mount the Harley swivel end. I took several measurements
and found that 3" was the best length to cut it. Be sure
to experiment with the length yourself. You might find
that my measurements are not to your liking.
Finally, all that is needed to complete the job is to paint
or chrome the final product. I chose to paint my bar.
Whatever you do, remember to protect the machined
ends so that they don't get coated. Also, don't forget to
grease those ends so they won't rust.